Tactile Transducer
| Tactile Transducer | |
|---|---|

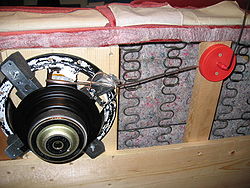
Mounted Transducer | |
| Information | |
| Owner | Mikemsd |
| Version | 1.0 |
| Started On | October 2004 |
| Cost | Unknown |
| Media | |
Overview
This project was based on an article about building a tactile transducer out of a speaker for mounting to a couch. This was built with a friend of mine that has since moved away, taking the couch with him. The tactile transducer was built to hook into the sub output on a home theater set up and provide a tactile rumble in the seating for low frequency noises such as explosions. I did this project 6 years ago, so I will attempt to reconstruct it along with my thoughts at the time. Some steps may be missing or omitted. Since you will be working with lead and some high voltages, take all appropriate precautions. This project should be attempted by adults only, or at the very least with the supervision of an adult.
Features
- Built using old Panasonic car sub speaker and KLH sub amp.
- Plug built into couch to allow for easy movement.
- Sub amp modified to add cooling and add plug to top.
Parts
- Transducer
- Sub Amp
- Sub Speaker
- Lead Weights (Available at outdoor goods stores, typically used to make home made fishing weights)
- Epoxy (We used 30 minute)
- Foam cushioning
- Flexible aluminum strips
- Couch Mounting
- 1x8 Wooden board
- Speaker connector (I used an RCA jack)
- Speaker wire
- Wood Glue
Tools Required
- Latex Gloves (You are handling lead of course)
- Saw of some sort to cut 1x8 board
- Screwdriver
- Drill
- Disposable Mixing Cups
Construction
Speaker
- Outer cone is removed from speaker
- I used an exacto hobby knife for this process to ensure a clean cut
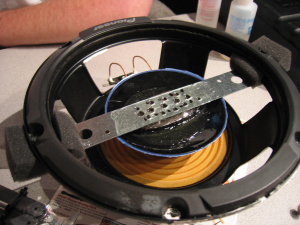
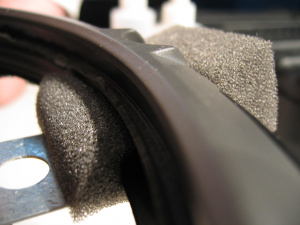
- Cut foam for cushioning and mount initial aluminum strip.
- Foam prevents vibration noises from the metal to metal contact. This speaker should be felt not heard.
- Foam and aluminum bar should be underneath metal ring surrounding speaker, not just under the plastic trim strip.
- Trim strip was removed at the end of this project to flush mount speaker to couch.
- We used an aluminum strip with pre-drilled holes in the center. This allows the epoxy to get a better grip.
- Mix epoxy and fill inner cone connected to driven element.
- Epoxy binds the aluminum strip to the driven element.
- Allow epoxy to set before continuing.
- Epoxy together lead weights. We used six weights for this.
- There is a balance to reach here. Too many weights and the driver can successfully move them, too little and you won't feel the rumble.
- These weights are commonly available at outdoor stores. They are sold in the fishing department. They are used by people making their own weights.
[[image::Transducer4.JPG|thumb|left|Lead Weights Assembled]]
- Attach lead weights to aluminum bar
- Sandwich the weights with foam strips for best results.
- We used zip ties to secure the weights and foam.
- Use another aluminum strip over the top to hold the assembly in place.
- Use more foam on top strip to prevent metal on metal contact.
- The strips should have enough give for the element to move.
[[image::Transducer5.JPG|thumb|left|Weights Attached]]
[[image::Transducer6.JPG|thumb|left|Zoomed Out]]


