Difference between revisions of "Intro to Soldering"

From MidsouthMakers - Memphis Area Hackerpace
Jump to navigation Jump to search
(adding additional sections to expand in the future)
Line 5: Line 5:
 
|alt =  
 
|alt =  
 
|caption =  
 
|caption =  
|start_date = {{date|2010-05-14|mdy}}
+
|start_date =  
|end_date = {{date|2010-05-14|mdy}}
+
|end_date =  
|cost = $5 to buy a kit<br>$5 to buy a soldering iron (optional)
+
|cost =  
|taught_by = Jwoodjr
+
|taught_by =  
 
|website =  
 
|website =  
 
|location = CBU
 
|location = CBU
Line 18: Line 18:
 
|youtube =
 
|youtube =
 
}}
 
}}
 +
 +
{{ambox |type=content |text = This workshop is being '''redone''' with the addition of an option precursor workshop.  Look for changes in the near future. }}
  
 
== Overview ==
 
== Overview ==
The purpose of this workshop is entirely to get people introduced to soldering.  It allows them an opportunity to learn which end of the [[soldering iron]] is hot, the proper way to melt and apply the solder, and a chance to assemble a small circuit and see that it does not run on smoke and mirrors.  The current workshop assembles a very small circuit composed of a [[555 Timer]] that triggers a LED to remain high for 4.7 seconds.
+
The purpose of this workshop is to educate individuals on how to solder by means of soldering together a predesignated circuitThis does not include the wiring of the circuit, but merely the soldering of the components into a board with the circuit already etched onto it.  The circuit board will come from either the [[Intro to Etching]] workshop, or bought as a prefabbed board.
 +
 
 +
== Components ==
 +
{{expand section}}
  
 
== Tools ==
 
== Tools ==
{{Expand section}}
+
{{expand section}}
  
 
== Instructions ==
 
== Instructions ==
{{Expand section}}
+
{{expand section}}
 
 
== The Circuit ==
 
[[Image:One Shot Triggering LED Schematic.png|left|400px]]
 
The circuit pictured is called a Monostable Multivibrator configured as a One Shot.  It is commonly used in a fashion known as switch debouncing.  In this particular circuit it is making use of the 5 volt output of the 555 Timer to power the LED for 4.7 seconds.  The circuit can be split into 5 different sections for simplicity of explanation.


<div style="clear:both;"></div>
 
=== Vs ===
 
This is simply the power for the whole circuit.  In this particular workshop, the power is two LiPo CR2032 coin cell batteries that are put together and wires coming off for the positive and negative.  Each CR2032 battery outputs 3 volts, and since they are connected in series with one other, providing a total of 6 volts to the whole circuit.


=== R1 & S1 ===
 
R1 is a 10k ohm resistor that is used as a pull down resistor together with the switch so that when the switch is pressed, the trigger pin on the 555 timer goes low.  Once that trigger pin goes low, the 555 Timer's output will remain high for the duration of its cycle.


=== R2 & C1 ===
 
R2 and C1 together are the determining factor in how long the 555 Timer's output remains high.  The formula used to determine the length of the duty cycle is T = ln(3)*R2*C1 or T ~ 1.1*R2*C1.  In this particular case that is 1.1(91000 ohms)(.000047 farads) = 4.7 seconds.


=== 555 Timer ===
 
The interesting and useful thing about a 555 Timer is that its output is has very sharp edges and is either high (5 volts) or low (0 volts).  This is particularly ideal for computers and other electronics because you don't have a gradual change from one state to another, it is very clean cut and straight forward.  That's how the computer get's its notion of 0's and 1's, but if the voltage lingers somewhere in betweeen, it isn't able to distinguish if it is either a 1 or a 0.
 
  
=== R3 & LED1 ===
+
== Circuit ==
R3 is here to simply service the LED, and the LED is here to provide a means of telling when the 555 Timer's output is high.  The way this works is you have 5 volts coming out from the 555 Timer, and an LED work on roughly 3.4 volts.  If the 5 volts were to travel across the LED, it would simply burn it out because there is too much current going through it.  So we reduce the voltage across the LED and therefore reduce the current through it.  The easiest way to do this is via a resistor.  The way we calculate that is by taking the 5 volts out and subtracting the 3.4 volts that the LED can handle, leaving us with 1.6 volts that we have to get rid of.  We also know from the specs of the LED that it pulls roughly 20 milliamps, so using Ohm's Law (V = I * R), we can say that the value of the resistor needed is (1.6 volts)/(0.02 amps) = 80 ohms.  This rounded to the nearest regular resistor value would be 82 ohms.
+
{{expand section}}

Revision as of 21:37, 12 August 2010

Intro to Soldering
Information
Location CBU


Overview

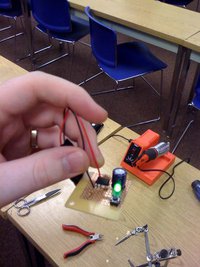
The purpose of this workshop is to educate individuals on how to solder by means of soldering together a predesignated circuit. This does not include the wiring of the circuit, but merely the soldering of the components into a board with the circuit already etched onto it. The circuit board will come from either the Intro to Etching workshop, or bought as a prefabbed board.

Components

Tools

Instructions

Circuit